Yamaha RX-V683 Manual: Comprehensive Guide
Discover detailed setup, interface navigation, advanced features, troubleshooting, and maintenance for your Yamaha RX-V683 receiver, enhancing your audio experience․
Welcome to the world of immersive home entertainment with the Yamaha RX-V683 AV receiver! This comprehensive manual serves as your guide to unlocking the full potential of this powerful and versatile component․ The RX-V683 is designed to deliver exceptional audio and video performance, seamlessly integrating into your existing home theater setup․
Whether you’re a seasoned audiophile or a first-time receiver owner, this manual will provide clear, step-by-step instructions for everything from initial setup and configuration to advanced customization and troubleshooting․ We’ll explore its key features, network capabilities, and how to optimize sound for your specific room․ Prepare to elevate your viewing and listening experiences with the Yamaha RX-V683!
Key Features and Specifications
The Yamaha RX-V683 boasts 7․1-channel surround sound with a powerful amplifier delivering 90W per channel․ It supports 4K Ultra HD video with HDR10 and Dolby Vision pass-through, ensuring stunning visual clarity․ Key features include built-in Wi-Fi for seamless streaming via services like Spotify and Pandora, and Bluetooth for wireless connectivity․
The receiver also incorporates Yamaha’s YPAO calibration system for optimized room acoustics․ It features HDMI input/output with HDCP 2․2 compatibility, ensuring compatibility with the latest devices․ With support for various audio formats like Dolby TrueHD and DTS-HD Master Audio, the RX-V683 delivers a truly cinematic experience․ Its network capabilities and versatile connectivity make it a central hub for your home entertainment system․

Setting Up Your RX-V683
Begin with speaker and cable connections, followed by network setup and Wi-Fi configuration, then assign input sources for optimal performance․
Initial Connections: Speakers & Cables
Proper speaker and cable connections are fundamental to achieving optimal audio performance with your Yamaha RX-V683․ Begin by identifying the correct speaker terminals on both the receiver and your speakers – ensuring polarity (positive to positive, negative to negative) is maintained throughout․ Use speaker wire of appropriate gauge; thicker wire generally performs better over longer distances․
Connect the front left, front right, center, and surround speakers to their corresponding terminals․ If utilizing a subwoofer, connect it to the dedicated subwoofer output․ For HDMI connections, use high-speed HDMI cables to connect your source devices (Blu-ray player, gaming console, etc․) to the RX-V683’s HDMI inputs․ Remember to securely fasten all connections to prevent signal loss or interference․ Double-check all wiring before powering on the receiver․
Network Setup & Wi-Fi Configuration
Connecting your Yamaha RX-V683 to your home network unlocks a world of streaming possibilities and firmware updates․ Access the network settings through the receiver’s on-screen display (OSD)․ You can choose between a wired Ethernet connection for stability or a wireless Wi-Fi connection for convenience․
For Wi-Fi, select your network from the available list and enter your password when prompted․ Ensure your network is operating on a 2․4GHz or 5GHz frequency, as the RX-V683 supports both․ Once connected, the receiver will obtain an IP address․ Verify the connection by testing internet access through the receiver’s network settings menu․ A stable network connection is crucial for seamless streaming and control via the Yamaha AV Controller app․
Input Source Selection & Assignment
The Yamaha RX-V683 offers multiple input sources, including HDMI, optical, coaxial, and analog audio․ To select an input, use the “Input” button on the remote control or the front panel․ Cycle through the available inputs until you reach the desired source․
You can also assign custom names to each input for easier identification․ This is done through the receiver’s setup menu․ For example, you might label HDMI 1 as “Blu-ray Player” and HDMI 2 as “Gaming Console․” Proper input assignment streamlines your viewing experience․ Remember to configure HDMI control (CEC) for simplified operation with compatible devices, allowing control of multiple devices with a single remote․
Understanding the RX-V683 Interface
Explore the receiver’s on-screen display, remote control, and Yamaha AV Controller app for seamless navigation and control of your audio settings․
On-Screen Display (OSD) Navigation
The Yamaha RX-V683’s On-Screen Display (OSD) provides a user-friendly interface for configuring settings and accessing various functions․ Navigating the OSD is primarily done using the remote control’s cursor keys – up, down, left, and right․ The ‘Enter’ button confirms selections, while ‘Menu’ accesses the main setup menu․
Within the main menu, you’ll find options for adjusting audio parameters like speaker levels, surround sound modes, and equalization settings․ Video settings allow you to configure HDMI input assignments and adjust picture preferences․ Network settings enable Wi-Fi configuration and access to streaming services․
Pay attention to the OSD’s hierarchical structure; options are often nested within submenus․ Utilize the ‘Return’ button to navigate back to previous screens․ The OSD also displays helpful information about the current input source, audio format, and receiver status․ Familiarizing yourself with the OSD layout is crucial for maximizing the RX-V683’s capabilities․
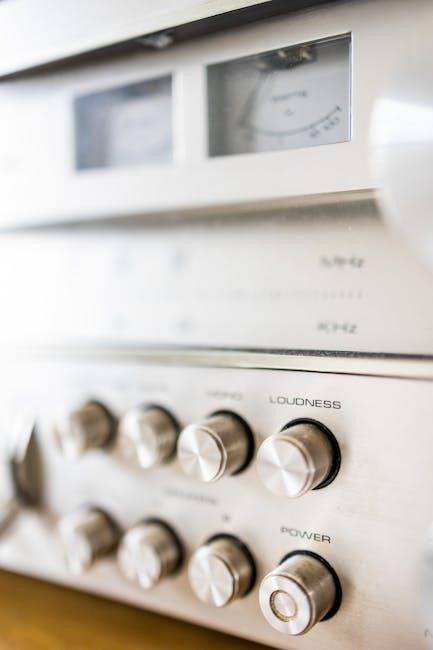
Remote Control Functions & Layout
The Yamaha RX-V683 remote control is your primary command center․ At the top, you’ll find power, input selection buttons (Blu-ray, CD, TV, etc․), and a straight access to streaming services․ Central to the layout are the cursor keys for navigating the On-Screen Display (OSD), alongside ‘Enter’ and ‘Menu’ buttons for confirmation and access․
Volume and mute controls are prominently placed․ Dedicated buttons offer quick access to sound modes (Surround, Stereo, Direct) and listening presets․ The ‘Setup’ button unlocks advanced configuration options․ A numeric keypad facilitates direct input selection․
Understanding the remote’s layout streamlines operation․ Experiment with each button to discover its function․ Battery replacement is straightforward, typically requiring two AA batteries․ Keep the remote clean and avoid dropping it to ensure reliable performance and longevity․
Yamaha AV Controller App Integration
The Yamaha AV Controller app extends control of your RX-V683 to your smartphone or tablet․ Download it from the App Store (iOS) or Google Play Store (Android)․ Once installed, the app automatically discovers the receiver on your network, simplifying setup․
The app mirrors many remote control functions, offering volume control, input selection, and sound mode adjustments․ It provides access to advanced settings, like YPAO calibration and network configurations, from a convenient interface․
Furthermore, the app enables multi-zone control, allowing independent audio playback in different rooms․ Enjoy music streaming from various services directly through the app․ Regular updates enhance functionality and compatibility․ Ensure your receiver and mobile device are connected to the same network for seamless integration․

Advanced Features & Settings
Explore YPAO calibration, customizable surround sound modes, and HDMI control options within the RX-V683, optimizing performance and connectivity․
YPAO Calibration System: Room Optimization
Yamaha’s YPAO (Yamaha Parametric Room Acoustic Optimizer) is a powerful calibration system designed to optimize the sound of your RX-V683 receiver specifically for your listening room․ This automated system analyzes the room’s acoustics by emitting test tones through the connected speakers and then measures the reflected sound․
Based on these measurements, YPAO automatically adjusts various parameters, including speaker levels, distances, and equalization, to create the most accurate and immersive surround sound experience possible․ The RX-V683 features a microphone that connects directly to the receiver for the calibration process․ Follow the on-screen prompts carefully during setup to ensure accurate results․ Multiple calibration points can be measured for enhanced precision, especially in larger rooms․ Utilizing YPAO significantly improves clarity, imaging, and overall sound quality․
Surround Sound Modes & Customization
The Yamaha RX-V683 offers a diverse range of pre-set surround sound modes designed to enhance different types of audio content․ These include options optimized for movies, music, and gaming, such as Dolby Surround, DTS-HD Master Audio, and various Yamaha-specific DSP modes like Cinema DSP 3D․
Beyond the presets, the RX-V683 allows for extensive customization․ Users can adjust parameters like speaker levels, crossover frequencies, and delay times to fine-tune the sound to their preferences and room acoustics․ The receiver also supports manual EQ adjustments for precise tonal control․ Experimenting with these settings allows you to tailor the surround sound experience to perfectly match your content and listening environment, achieving optimal immersion and clarity․

HDMI Control (CEC) & Troubleshooting
The Yamaha RX-V683 utilizes HDMI Control (CEC) to simplify operation with compatible devices․ This allows control of functions like power, volume, and input selection across connected devices using a single remote․ However, CEC compatibility varies between manufacturers, potentially causing conflicts․
Troubleshooting CEC issues often involves ensuring CEC is enabled on both the receiver and connected devices (often labeled as Bravia Sync, Anynet+, or Simplink)․ If problems persist, try disconnecting and reconnecting HDMI cables, or updating the firmware of all devices․ A factory reset of the receiver can also resolve stubborn CEC conflicts․ Remember to consult the manuals of all connected devices for specific CEC settings and compatibility information․

Troubleshooting Common Issues
Resolve typical problems like sound loss, network failures, and remote control malfunctions with our guide, ensuring optimal performance of your RX-V683 receiver․
No Sound Output: Diagnosing the Problem
Encountering silence from your Yamaha RX-V683? Begin by verifying the speaker connections – ensure they are securely fastened to both the receiver and the speakers themselves․ Confirm the selected input source is correct and actively transmitting audio․ Double-check the receiver’s volume level and mute status; a simple oversight can cause this issue․
Next, investigate the speaker settings within the receiver’s menu․ Verify the correct speaker configuration is selected to match your setup (e․g․, 5․1, 7․1)․ Test each speaker individually using the receiver’s test tone function to identify any potentially faulty speakers or channels․ If using HDMI, ensure the HDMI cable is properly seated and supports audio transmission․ Finally, consider a receiver reset to factory defaults as a last resort, potentially resolving software-related conflicts․
Network Connectivity Problems & Solutions
Experiencing difficulties connecting your Yamaha RX-V683 to your network? First, confirm your Wi-Fi router is functioning correctly and broadcasting a signal․ Verify the receiver is within range of the router, minimizing potential interference from walls or other devices․ Double-check the entered Wi-Fi password within the receiver’s network settings – accuracy is crucial․
If the connection remains unstable, try restarting both the receiver and your router․ Consider assigning a static IP address to the RX-V683 within your router’s settings for a more reliable connection․ Ensure the receiver’s firmware is up-to-date, as updates often include network stability improvements․ Finally, explore using a wired Ethernet connection for a consistently stable network link, bypassing potential Wi-Fi issues․
Remote Control Not Working: Battery & Pairing
If your Yamaha RX-V683 remote isn’t responding, begin with the simplest solution: replace the batteries with fresh ones, ensuring correct polarity․ Next, visually inspect the remote’s infrared (IR) emitter for any obstructions․ Confirm there’s a clear line of sight between the remote and the receiver’s IR sensor – remove any objects blocking the signal․
For initial setup or after battery replacement, pairing might be necessary․ Consult the manual for the specific pairing procedure, often involving pressing and holding certain buttons on the remote while the receiver is powered on․ If pairing fails, try resetting the remote (refer to the manual for instructions)․ A malfunctioning remote may require replacement – contact Yamaha support for assistance․
Maintenance & Care
Ensure optimal performance by regularly cleaning the RX-V683 and applying firmware updates as they become available, safeguarding longevity and functionality․
Cleaning and Dust Removal
Maintaining a clean RX-V683 is crucial for optimal performance and longevity․ Dust accumulation can lead to overheating and potential component failure․ Regularly, at least every few months, use a soft, dry cloth to gently wipe down the exterior surfaces of the receiver․ Avoid using liquid cleaners or abrasive materials, as these can damage the finish․
For internal dust removal, it’s generally recommended to avoid opening the unit yourself unless you are a qualified technician․ If you suspect significant dust buildup inside, consider professional cleaning services․ Pay particular attention to the ventilation slots on the rear and top of the unit, ensuring they are free from obstruction․ A can of compressed air can be carefully used to blow out dust from these areas, holding the can upright to prevent liquid propellant from escaping․
Always disconnect the power cord before cleaning to prevent electrical shock․ Consistent, gentle cleaning will help keep your RX-V683 operating efficiently for years to come․
Firmware Updates & How to Apply Them
Yamaha periodically releases firmware updates for the RX-V683 to improve performance, add new features, and address potential bugs․ Checking for updates is essential for maintaining optimal functionality․ You can typically find the latest firmware on the official Yamaha website, within the support section for your specific model․
The update process usually involves downloading the firmware file to a USB flash drive, formatted to FAT32․ Then, with the receiver powered on, navigate to the “Setup” menu, and locate the “Firmware Update” option․ Select the USB drive, and follow the on-screen instructions․ Crucially, do not interrupt the update process, as this could damage the receiver․
Ensure a stable power supply during the update․ Yamaha provides detailed instructions and warnings within the firmware update documentation; carefully review these before proceeding․
Yamaha Support & Resources
For comprehensive assistance with your Yamaha RX-V683, Yamaha offers a wealth of support resources․ The official Yamaha website ([https://usa․yamaha․com/](https://usa․yamaha․com/)) provides access to downloadable manuals, FAQs, troubleshooting guides, and firmware updates specifically tailored to your receiver model․
Yamaha’s online support portal allows you to submit inquiries directly to their customer support team, receiving personalized assistance with any issues you may encounter․ Additionally, the Yamaha community forums are a valuable platform for connecting with other RX-V683 owners, sharing experiences, and finding solutions to common problems․
Authorized Yamaha service centers are available for hardware repairs and maintenance․ Locate a service center near you through the Yamaha website’s service locator tool․